01.01.13
Posted in General at 8:32 pm by jw
Nice short little “how to fix this” one.
I upgraded to Office 2013 and found that when Outlook connected to my local IMAP server it wanted to keep most of the “special” folders locally. This didn’t concern me too much, except for the “Sent Items” folder, which I really want to keep and share between desktop reinstalls or just between the three or four machines I read and send email from these days.
After a long piece of searching around all the different account and general options in Outlook I came to the conclusion that the manual configuration that used to be available in Outlook 2010 for choosing where each “special” folder would point to had just gone so I had to go on a bit of a hunt around Google to figure out where they’d gone!
Turns out, Outlook 2013 uses the XLIST command in IMAP to determine what each special folder is on the server and if it doesn’t find it there then it just makes “This computer only” folders to hold the information. Cyrus can be configured to properly report these (as you’d expect) and adding the following to my /etc/imapd.conf fixed the problem, after deleting my account in Outlook and recreating it:
# Special-Use Mailboxes. Use xlist- prefix to the list of special use
# attributes defined in RFC 6154. Attribute name in the configuration
# key should be defined in lowercase. The attribute value is case
# sensitive, may contain whitespace and and must be valid
# UTF7-IMAP string.
#
xlist-archive: Archives
xlist-drafts: Drafts
xlist-sent: Sent
xlist-spam: Spam
xlist-trash: Trash
Now Outook behaves itself, stores all the sent items in “Sent”, the deleted items in “Trash” and drafts in “Drafts”. All my other devices (Android, iOS, etc.) seem to honor the settings as well.
Permalink
08.21.12
Posted in General at 9:09 pm by jw
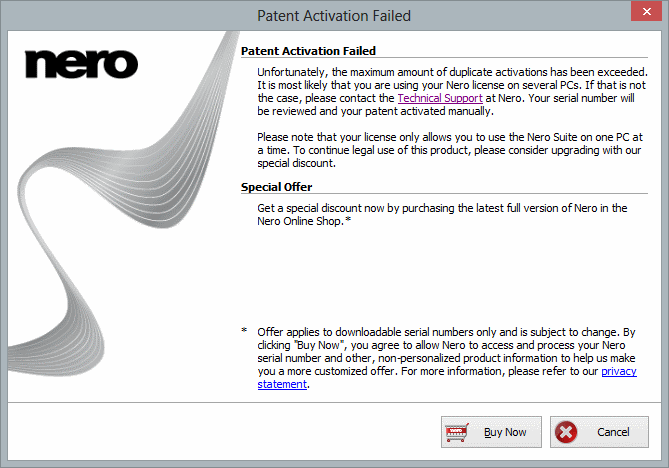
After installing Windows 8, I went to reinstall Nero 10 (because they broke Recode in Nero 11 by trying to make it “friendly”) because my daughter likes Fireman Sam at the moment and I wanted to mp4 some of the TV I’d recorded for her. Turns out that the idiots at Nero have decided that no one would ever keep their product around for as long as I have and through the number of reinstalls I have and therefore I must be a criminal:
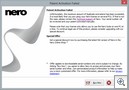
This is the problem with stupid DRM decisions. Had I taken the easy (and cheaper) route of piracy then some cracker would have solved this for me and I’d never have had any issues with the program. Instead, by paying for the software, I get subjected to random failures like this which require me to justify to the company that I paid good money to that I’m actually NOT a criminal. What a wonderful way to make me think twice about ever giving money again and just taking the easier, cheaper and better performing route of piracy.
All I can say is they completely lost me as a future customer today (although Nero 11 had me most of the way there anyway).
Permalink
04.17.12
Posted in General at 12:48 am by jw
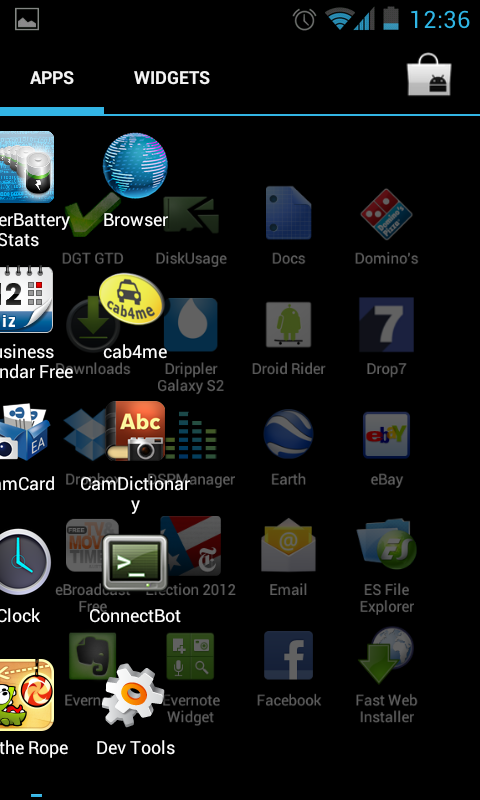
As I mentioned on Google+ (which I use for my geek talk), I really didn’t like the idea of TouchWiz being put on top of Ice Cream Sandwich (Android 4.0) for my Galaxy S2. The fact that this update was coming up fast over here in Australia made me think about it more, and having ICS on my Transformer Prime and really enjoying it really sealed the deal for me. So, I went through the fun of figuring out exactly what I needed to do to get a better system on the phone than Samsung was going to give me.
I went for CyanogenMod because it was what I knew and I had a friend that had a lot of good success with it. It also appeared very well supported and wasn’t trying to be anything more than a good alternative firmware – solid and useful rather than crazy bells and whistles, at least that’s the impression I had. CyanogenMod9 was based on ICS and had recently made leaps ahead on the SGS2 after Samsung released the source for their port so it was a good time to move.
So, here’s how I did it, skipping the Google searches and XDA threads I read in the process:
Step 1: Get root access to the phone
XDA Thread is here. All this is assuming you have a stock kernel. If you already have root on your phone then move along…
The first post has an attachment for Odin3–v1.85.zip. Download and extract it somewhere.
Figure out the right file to use. From the first post in the thread:
Go to Settings -> About phone -> Kernel Version http://www.tadalafilgenerique.org/. Note the string present there:
2.6.35.7-I9100XXKG1-CL349526
What matters most (KG1) in this case, is in bold. Try to find the matching file under downloads:
CF-Root-SGS2_XX_OXA_KG1-v4.1-CWM4.zip
The XX and OXA identifiers are not that important. Usually a “KG1” kernel is a “KG1” kernel, and that is that. Sometimes (pretty rare) it happens there will be multiple different kernels with the same name in different firmwares, that are actually different. If this happens, they are usually only very minor changes and you should expect them to still be fully compatible. I include the “XX” and “OXA” identifiers so the very advanced users can deduce from which full firmware I have taken the kernel file.
Don’t worry too much, just find the matching download and use it. What if there is no matching download? You can ask me to make one, but I can tell you right now, I very very rarely make CF-Root’s for kernels on request, unless it is the very latest kernel that has been released by Samsung. In the latter case, be sure to let me know. If there’s no match and I’m not making one, try finding the closest match. You should treat “KG1” as a number, but instead of 1-9, we have 1-9, A-Z (where A would be 10, and Z would be 35). “KG2” is really close to “KG1“, “KF1″ is not close to “KG1″ at all. I hope that makes sense.
In my case, I used “CF-Root-SGS2_XW_XEN_KK2-v5.0-CWM5.zip” because my phone reported a “KK” kernel.
So, repeating again from the XDA post (and this is basically the only dangerous bit in the whole process so do exactly what it says):
Instructions – ODIN (long)
– Follow these instructions to the letter. Do not touch any buttons or checkboxes that are not listed below to touch!
– Unzip the attached CF-Root-xxx-vX.X.zip
– (USB) Disconnect your phone from your computer
– Start ODIN
– Click the PDA button, and select CF-Root-xxx-vX.X.tar
– Put your phone in download mode
– (USB) Connect the phone to your computer
– Make sure repartition is NOT checked
– Click the START button
– Wait for the phone to reboot
– Done (if it took you more than 30 seconds, you need practise!)
Note that “put your phone in download mode” means powering the phone down, then powering it on again with Power and Volume-Down both held until the warning message turns up on your phone asking if you really, truly want to do what you’re about to do (you probably do, otherwise you wouldn’t be reading this).
After all that, you have a “rooted” phone (or jailbroken if you prefer). It boots with a pretty yellow warning sign on the splash screen that you can be proud of, and warns Samsung techs that you’ve gone off the reservation. There’s ways to get rid of this – I haven’t bothered because I know what I’ve done and don’t care.
Step 2: Install CyanogenMod9
Now we have a rooted phone we have all the tools we need to install a custom firmware. I followed the XDA thread to install it, but the summary is below:
- Back up all your contacts, SMS and phone logs (use Titanium Backup, or something similar) as this process will wipe that data.
- Get the latest nightly build (there’s no stable builds at the time I wrote this). Transfer it to the root directory on your phone’s SD Card (usually mounted at /sdcard).
- Get the latest google apps and transfer them to the same spot as the build (you’re looking for the “CyanogenMod 9.0.x” ones). That should leave two zip files in that directory (ie don’t unzip them).
- Reboot into ClockworkMod Recovery by powering down then powering back up with Power and Volume-Down both held. You should get a menu, not the warning you received previously as Step 1 replaced the bootup process on your phone with a rescue menu to save you if anything blows up.
- Using the volume buttons and the home/power buttons, navigate to “install zip from sdcard”.
- Now, navigate to either “choose zip from sdcard” or “choose zip from internal sdcard” depending on where the recovery ROM thinks it’s loaded the files on your phone. It doesn’t hurt to look through either option until you see the zip files you put there.
- Select the latest nightly build and install it.
- Select the google apps and install it.
- Go back up a menu level and select “wipe data/factory reset”. You need this because you’ve just changed everything underneath the phone’s data – it’s a pretty tall order to assume everything will still work.
- Reboot
- (Don’t restore app data using Titanium Backup if you thought you might try it – things are in different places now and this will break them)
You now have your SGS2 running Ice Cream Sandwich through CyanogenMod 9. Congratulations. Party time. Now wait for it to download all your apps back down again once you reconnect to your Google account.

Step 3: Keeping up to Date
Now that you have a custom firmware, Samsung won’t keep you up to date any more. Keeping up to date with CM9 is pretty easy – just download the newest nightly build whenever you feel the urge, put it on the phone as before and install it from the ClockworkMod Recovery boot menu. There’s no need to install a new google apps, or wipe data/factory reset as the changes aren’t (usually) significant enough to warrant that sort of drastic step. You should, however, go into the advanced menu and wipe the cache and dalvik cache between upgrades. I’ve had no trouble at all with this part of the process.
You can see what’s been fixed/changed between any build here.
Other Stuff
Useful links summarized are:
CF-Root XDA Thread: http://forum.xda-developers.com/showthread.php?t=1103399
CF-Root Announcement: http://www.xda-developers.com/android/cf-root-available-for-sgs2/
CM9 SGS2 Downloads: http://download.cyanogenmod.com/?type=nightly&device=galaxys2
CM9 XDA Thread: http://forum.xda-developers.com/showthread.php?t=1419102
CM SGS2 Changelog: http://cm-nightlies.appspot.com/?device=galaxys2
Team Hacksung: http://teamhacksung.org/wiki/index.php/Main_Page
CM Wiki SGS2: http://wiki.cyanogenmod.com/wiki/Samsung_Galaxy_S_II:_Full_Update_Guide
Some random blog’s changelog: http://shetalksandroid.blogspot.com.au/2012/01/reviews-of-latest-cm9-builds-for-sgs2.html
SGS2 Modems: http://forum.xda-developers.com/showthread.php?t=1131950
Whirlpool Modem Discussion: http://forums.whirlpool.net.au/archive/1826834
Modem firmware dramatically changes the reception you’ll receive on both voice and data. It’s seriously worth playing with the different modem firmwares available to get the best performance. I’m currently using the “KP8” firmware and it is behaving pretty well for me, but your mileage may vary.
It’s probably possible to flash the stock firmware back onto your phone. It’s probably not easy. Make sure you really want to do this before you do because you may as well assume a one way trip.
Permalink
03.17.12
Posted in General at 6:14 pm by jw
I got an iPad 3 (for my wife – the Transformer Prime is way better for me) and while the screen is very nice, I can’t say that it’s a “revolution” or any of the other idiocy floating around. It’s actually nothing more special than a HD TV from a viewer’s perspective:
My iPad 3 has 250 pixels per inch, and is designed to be held at 12 inches away.
My TV has about 40 pixels per inch and is designed to be viewed from 10 feet or more.
Apparent pixel size is 400 pixels per inch on the TV, comparing like to like, which blows any of Apple’s “retina displays” out of the water. Seeing pixels on a BluRay movie or 1080p game like Final Fantasy XIII is flat out impossible, and predates any retina nonsense. So, they’re nice and all but hardly something unheard of.
Permalink
03.12.12
Posted in General at 12:50 am by jw
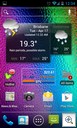
Been a while. I’ve had lots of interesting stuff to blog about, just been slack and haven’t written any of it down. Finally I got excited again – just took some messing around with a new tablet to get it done!
So, I went crazy and bough a Transformer Prime because I really wanted a table now that my wife has her iPad 2. Purchase decision was actually pretty easy – I wanted an Android device (because I love my Samsung Galaxy S2 phone) and the Tegra 3 was just too good to go past. It took some work to find somewhere in the US with it in stock but eventually I settled on Abe’s of Maine because they had the tablet and appeared a good quality merchant that had it at the magical sub-$500 price point. Some phone calls later (to sort out the credit card info) and a bit of a wait on supply later and it finally ended up over in Oz.
Initial setup was trivially easy – it sucked down the configuration of my Phone and tried to set itself up identically, upgrading from Honeycomb to Ice Cream Sandwich in the background. Everything was happy except for the odd reboot once or twice a day (more on that later).
Next, I decided that seeing the warranty was “return to base” and “base” was a hundred dollar courier away then there was nothing to lose in rooting it and putting clockworkmod into the bootloader just so I could try out Cyanogenmod when it finally gets stable on the Prime. Everything went very smoothly using vipermod and it’s a process I can absolutely recommend to anyone trying to do this on their prime.
Now the fun started. Some more research told me that the downloadable update (.15) fixed the reboot issue I described previously and a quick check showed me I only got the .14 update automatically during setup. Figured that would be easy enough to fix so I downloaded the .15 version from ASUS’s site and went to install it. Next thing I knew, my tablet was stuck at the Clockworkmod recovery screen and no matter what I tried, it wouldn’t get unstuck. To make matters worse, my laptop was reporting “Full Android on Emulator” as the USB device with no drivers available so I couldn’t even get adb to connect.
Making matters even worse, it seems that Clockworkmod can’t access the micro-SD slot so there’s actually no way to get a new firmware into the Prime if you mess something up. You need to make sure there’s a working one somewhere on the internal flash. Of course, I wasn’t smart enough to have done that so I really was stuck!
Some hours of searching over on xda-developers finally set things right. The fix was: tadalafil best price
- Fix up my adb drivers: the “Universal Driver” can be found here. Basically it’s a repack of the standard drivers with the appropriate fixes for running adb against Clockworkmod Recovery, and worked a treat once I had it installed.
- Use adb as outlined in Option 1a here.
Now I had my Prime booting back to the .14 firmware as before, which had achieved nothing but I knew now that putting an official firmware upgrade on a clockworkmod install is a really, really bad idea so there had to be a “proper” way of doing it. Turns out there is:
Go here. Jermaine151 has repacked the official firmware (with root enabled and some other stuff) which installs just beautifully on a clockworkmod install. So now I have a fully upgraded Transformer Prime, with custom firmware enabled and root privileges. One very happy camper.
Permalink